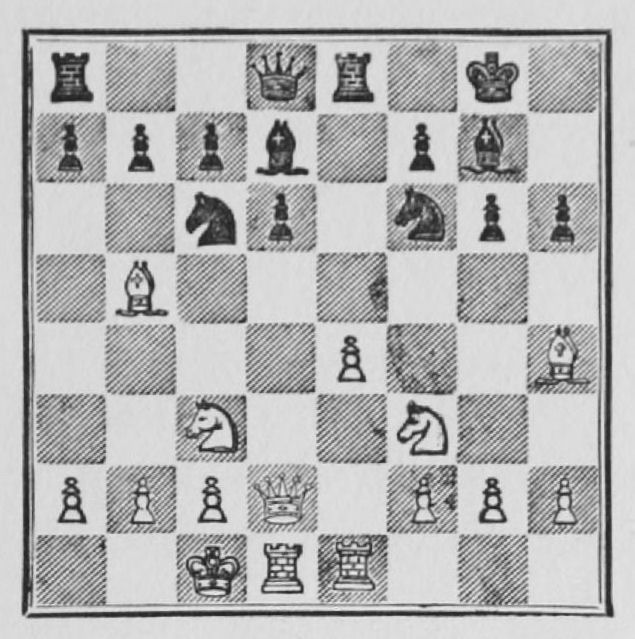
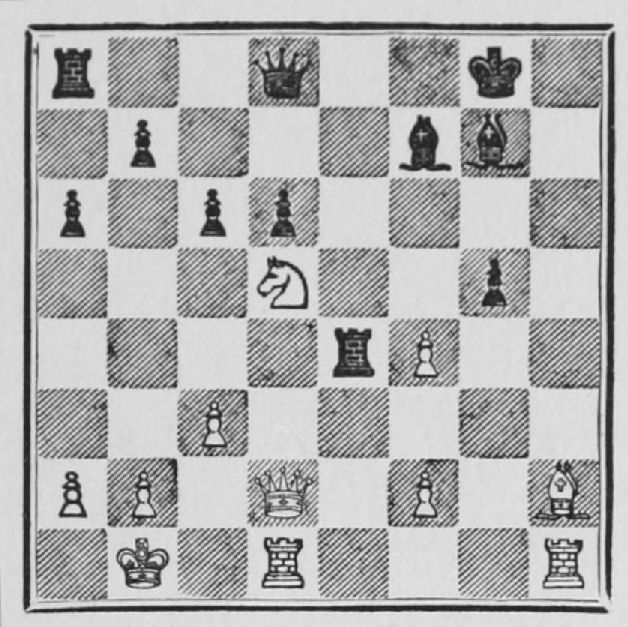
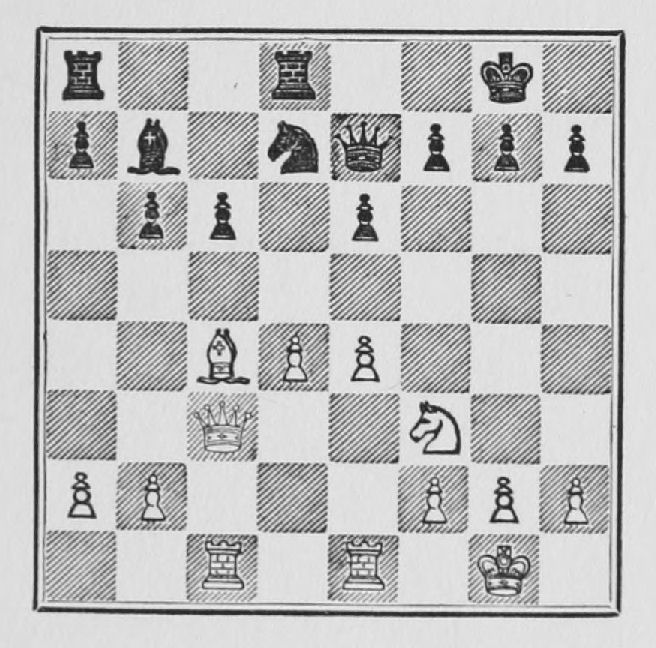
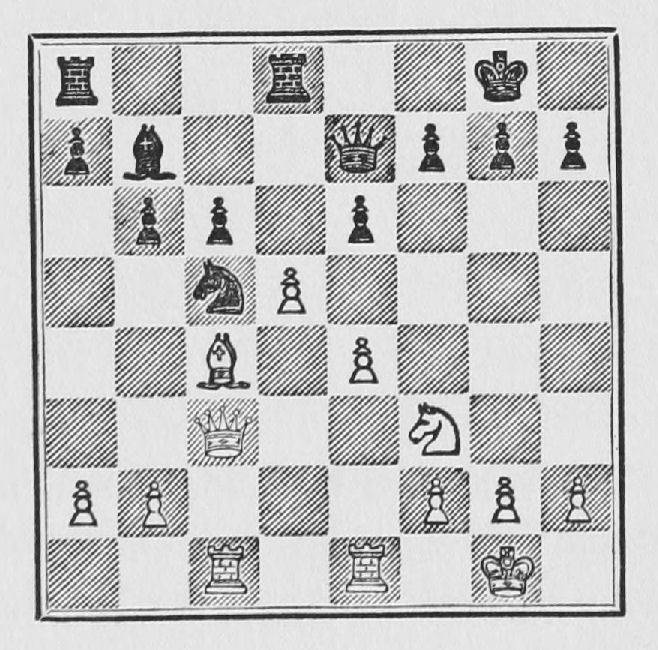
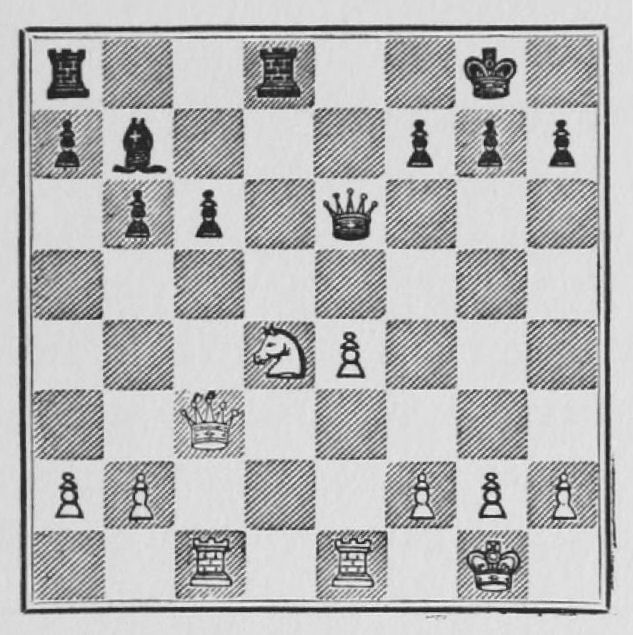
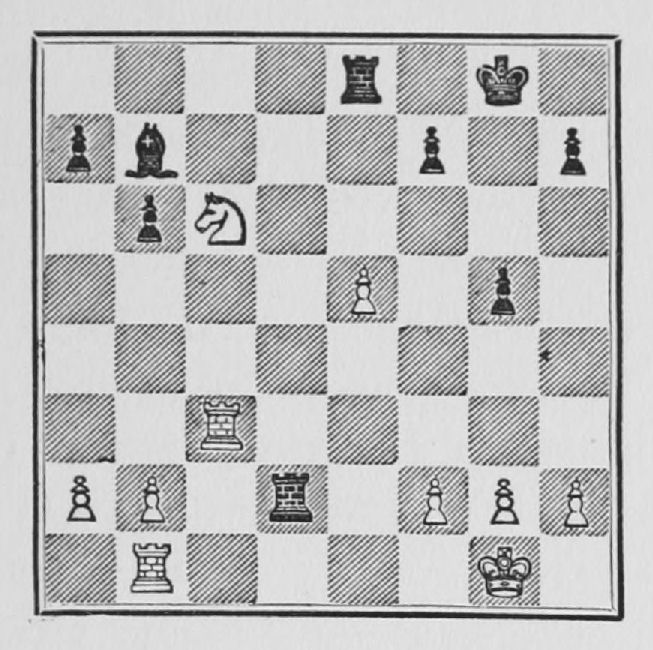
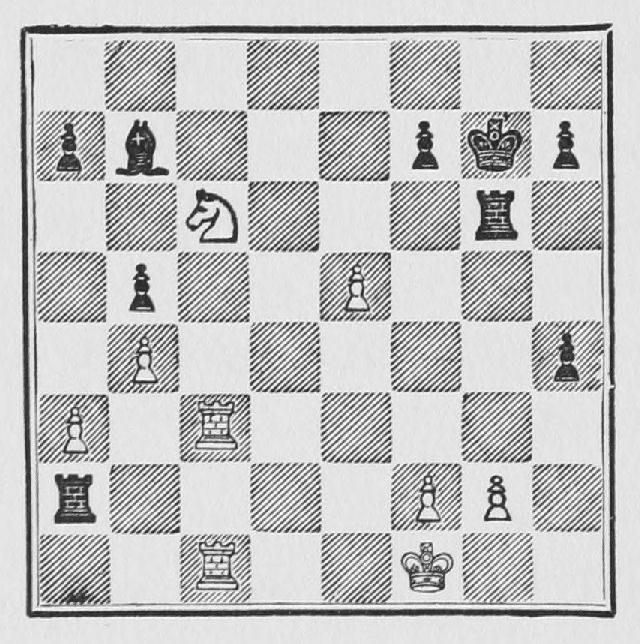
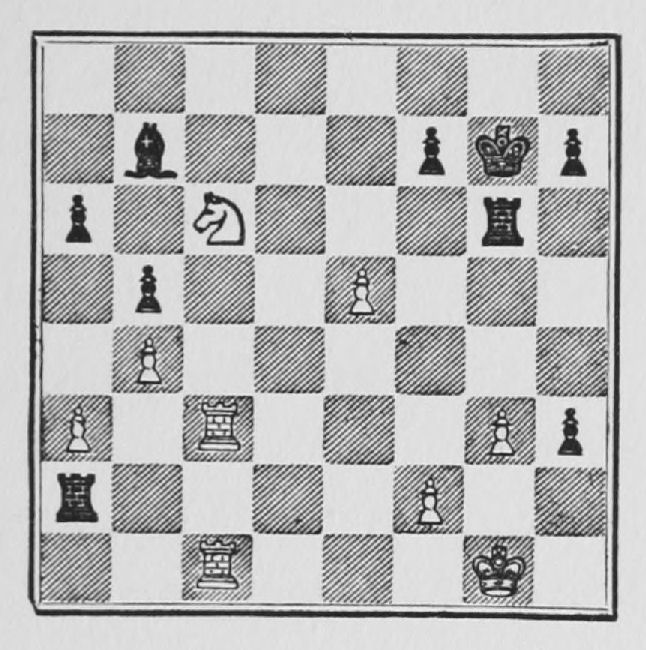
White wanted to keep his Q R on the open file, and consequently brings over his other Rook to the centre to defend his K P, which Black threatened to win by P - K Kt 4, followed by Kt × P.
| 12. ........ | P - Kt 4 ! |
Now that the K R is in the centre, Black can safely advance, since, in order to attack on the King's side, White would have to shift his Rooks, which he cannot do so long as Black keeps up the pressure in the centre.
| 13. B - Kt 3 | Kt - K R 4 |
Uncovering the Bishop, which now acts along the long diagonal, and at the same time preventing P - K 5, which would be answered by Kt × B; P × Kt, Kt × P; etc., winning a Pawn.
| 14. Kt - Q 5 | P - R 3 |
Black drives the Bishop away so as to unpin his pieces and be able to manœuvre freely.
| 15. B - Q 3 | B - K 3 |
Preparing the onslaught. Black's pieces begin to bear against the King's position.
| 16. P - B 3 |
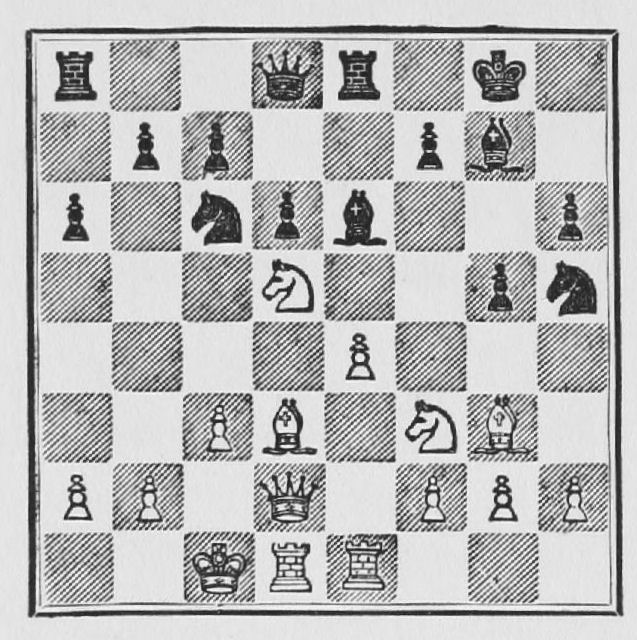
With the last move White not only blocks the action of Black's K B, but he also aims at placing his Bishop at Q Kt 1 and his Queen at Q B 2, and then advancing his K P, to check at K R 7.
| 16. ........ | P - B 4 ! |
Initiating an attack to which there is no reply, and which has for its ultimate object either the winning of the White Q B or cutting it off from the game. (Compare this game with the Winter-Capablanca game at Hastings.)
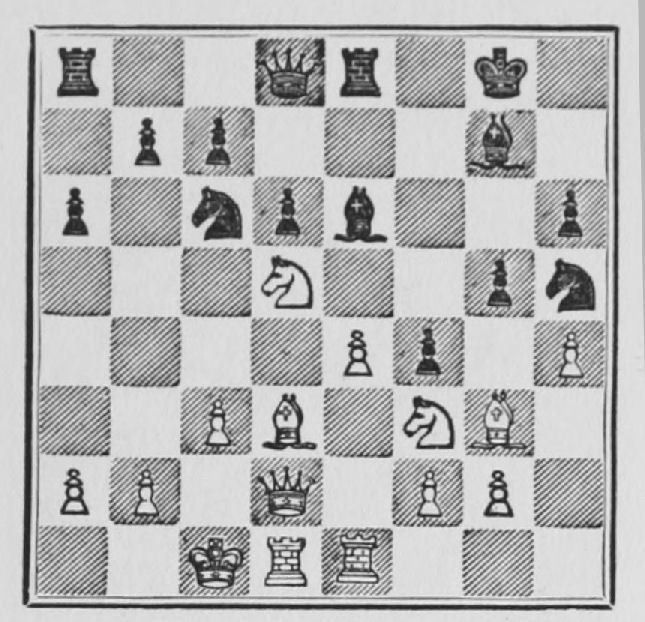
| 17. P - K R 4 | P - B 5 |
The Bishop is now out of action. White naturally counter attacks violently against the seemingly exposed position of the Black King, and, with very good judgment, even offers the Bishop.
| 18. P × P ! | P × P ! |
Taking the Bishop would be dangerous, if not actually bad, while the text move accomplishes Black's object, which is to put the Bishop out of action.
| 19. R - R 1 | B - B 2 | |
| 20. K - Kt 1 |
This move unquestionably loses time. Since he would have to retire his Bishop to R 2 sooner or later, he might have done it immediately. It is doubtful, however, if at this stage of the game it would be possible for White to save the game.
| 20. ........ | Kt - K 4 | |
| 21. Kt × Kt | R × Kt |
It was difficult to decide which way to retake. I took with the Rook in order to have it prepared for a possible attack against the King.
| 22. B - R 2 | Kt - B 3 |
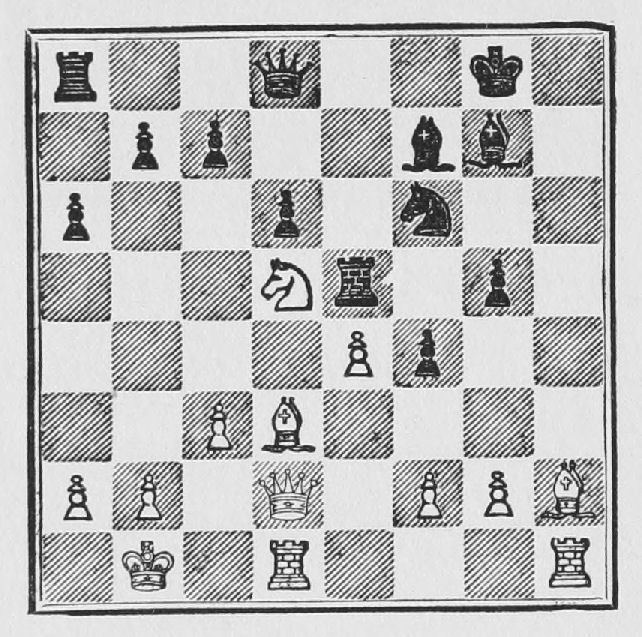
Now that the White Bishop has been driven back, Black wants to get rid of White's strongly posted Knight at Q 5, which blocks the attack of the Bishop at B 2. It may be said that the Knight at Q 5 is the key to White's defence.
| 23. P - Kt 3 |
White strives not only to have play for his Bishop, but also he wants to break up Black's Pawns in order to counter-attack. The alternative would have been 23 Kt × Kt ch, Q × Kt; and Black would be threatening R - R 4, and also Q - K 3. The student should notice that Black's drawback in all this is the fact that he is playing minus the services of his Q R. It is this fact that makes it possible for White to hold out longer.
| 23. ........ | Kt × P | |
| 24. B × Kt | R × B | |
| 25. P × P | P - B 3 |
| 26. Kt - K 3 |
Kt - Kt 4 was the alternative, but in any event White could not resist the attack. I leave it to the reader to work this out for himself, as the variations are so numerous that they would take up too much space.
| 26. ........ | Q - R 4 | |
| 27. P - B 4 | Q × Q | |
| 28. R × Q | P × P | |
| 29. Kt - Kt 4 | B - Kt 3 |
This forces the King to the corner, where he will be in a mating net.
| 30. K - R 1 | Q R - K 1 |
Now at last the Q R enters into the game and soon the battle is over.
| 31. P - R 3 |
If R × P, R - K 8 ch; R - Q 1, R (K 1) - K 7.
| 31. ........ | R - K 8 ch | |
| 32. R × R | R × R ch | |
| 33. K - R 2 | B - B 2 | |
| 34. K - Kt 3 | P - Q 4 |
the quickest way to finish the game.
| 35. B × P | P × P ch | |
| 36. K - Kt 4 | P - B 6 | |
| 37. P × P | R - K 5 ch | |
| 38. P - B 4 | R × P ch | |
| 39. K - R 5 | R × B | |
| 40. R - Q 8 ch | K - R 2 | |
| 41. R - Q 7 | B - K 3 | |
| Resigns. |
A very lively game.
GAME 14. QUEEN'S GAMBIT DECLINED
(New York, 1918)
White: F. J. Marshall. Black: J. R. Capablanca.
| 1. P - Q 4 | P - Q 4 | |
| 2. Kt - K B 3 | Kt - K B 3 | |
| 3. P - B 4 | P - K 3 | |
| 4. Kt - B 3 | Q Kt - Q 2 | |
| 5. B - Kt 5 | B - K 2 | |
| 6. P - K 3 | O - O | |
| 7. R - B 1 | P - B 3 |
This is one of the oldest systems of defence against the Queen's Gambit. I had played it before in this Tournament against Kostic, and no doubt Marshall expected it. At times I change my defences, or rather systems of defence; on the other hand, during a Tournament, if one of them has given me good results, I generally play it all the time.
| 8. Q - B 2 | P × P | |
| 9. B × P | Kt - Q 4 | |
| 10. B × B | Q × B | |
| 11. O - O | Kt × Kt | |
| 12. Q × Kt | P - Q Kt 3 |
This is the key to this system of defence. Having simplified the game considerably by a series of exchanges, Black will now develop his Q B along the long diagonal without having created any apparent weakness. The proper development of the Q B is Black's greatest problem in the Queen's Gambit.
| 13. P - K 4 | B - Kt 2 | |
| 14. K R - K 1 | K R - Q 1 |
The developing stage can now be said to be complete on both sides. The opening is over and the middle-game begins. White, as is generally the case, has obtained the centre. Black, on the other hand, is entrenched in his first three ranks, and if given time will post his Q R at Q B 1 and his Knight at K B 3, and finally play P - Q B 4, in order to break up White's centre and give full action to the Black Bishop posted at Q Kt 2. In this game White attempts to anticipate that plan by initiating an advance on the centre, which, when carefully analysed, is truly an attack against Black's K P.
| 15. P - Q 5 | Kt - B 4 ! |
Against Kostic in a previous game I had played Kt - B 1. It was carelessness on my part, but Marshall believed differently, otherwise he would not have played this variation, since, had he analysed this move, he would, I think, have realised that Black would obtain an excellent game. Black now threatens not only B P × P; but also Kt × P; followed by B P × P. The position is very interesting and full of possibilities.
| 16. P × K P | Kt × P (K 3) | |
| 17. B × Kt | Q × B |
played under the impression that White had to lose time in defending his Q R P, when I could play P - Q B 4, obtaining a very superior game. But, as will be seen, my opponent had quite a little surprise for me.
| 18. Kt - Q 4 ! |
| 18. ........ | Q - K 4 ! |
Of course, if 18...Q × R P; 19 R - R 1 would win the Queen. The text move is probably the only satisfactory move in the position. The obvious move would have been Q - Q 2 to defend the Q B P, and then would have come 19 Kt - B 5, P - B 3; 20 Q - K Kt 3 (threatening Q R - Q 1), K - R 1; 21 Q R - Q 1, Q - K B 2; 22 P - K R 4, with a tremendous advantage in position. The text move, on the other hand, assures Black an even game at the very least, as will soon be seen.
| 19. Kt × P | Q × Q | |
| 20. R × Q | R - Q 7 | |
| 21. R - Kt 1 |
A very serious error of judgment. White is under the impression that he has the better game, because he is a Pawn ahead, but that is not so. The powerful position of the Black Rook at Q 7 fully compensates Black for the Pawn minus. Besides, the Bishop is better with Rooks than the Knight (see pages 48-56, where the relative values of the Knight and Bishop are compared), and, as already stated, with Pawns on both sides of the board the Bishop is superior because of its long range. Incidentally, this ending will demonstrate the great power of the Bishop. White's best chance was to take a draw at once, thus. 21 Kt - K 7 ch K - B 1; 22 R - B 7 R - K 1 (not B × P; because P - B 3 would give White the best of it); 23 R × B (best; not Kt - Kt 6 ch, because of B P × Kt; followed by R × K P), R × Kt; 24 R - Kt 8 ch, R - K 1; 25 R × R ch, K × R, and with proper play White will draw.
It is curious that, although a Pawn ahead, White is the one who is always in danger. It is only now, after seeing this analysis, that the value of Black's 18th move Q - K 4 can be fully appreciated.
| 21. ........ | R - K 1 |
With this powerful move Black begins, against White's centre, an assault which will soon be shifted against the King itself. White is afraid to play 22 P - B 3 because of P - B 4.
| 22. P - K 5 | P - K Kt 4 |
To prevent P - B 4. The White Knight is practically pinned, because he does not dare move on account of R × K P.
| 23. P - K R 4 |
This is a sequel to the previous move. White expects to disrupt Black's Pawns, and thus make them weak.
| 23. ........ | P × P |
Though doubled and isolated this Pawn exercises enormous pressure. Black now threatens R - K 3; to be followed by R - Kt 3 and P - R 6 and R 7 at the proper time.
| 24. R - K 1 |
White cannot stand the slow death any longer. He sees danger everywhere, and wants to avert it by giving up his Queen's side Pawns, expecting to regain his fortunes later on by taking the initiative on the King's side.
| 24. ........ | R - K 3 ! |
Much better than taking Pawns. This forces White to defend the Knight with the Rook at K 1, because of the threat R - Kt 3.
| 25. R (K1) - Q B 1 | K - Kt 2 |
Preparatory to R - Kt 3. The game is going to be decided on the King's side, and it is the isolated double Pawn that will supply the finishing touch.
| 26. P - Q Kt 4 | P - Kt 4 |
To prevent P - Kt 5, defending the Knight and liberating the Rooks.
| 27. P - R 3 | R - Kt 3 | |
| 28. K - B 1 | R - R 7 |
Notice the remarkable position of the pieces. White cannot move anything without incurring some loss. His best chance would have been to play 29 P - K 6, but that would only have prolonged the game, which is lost in any case.
| 29. K - Kt 1 | P - R 6 | |
| 30. P - Kt 3 | P - Q R 3 |
Again forcing White to move and to lose something thereby, as all his pieces are tied up.
| 31. P - K 6 | R × K P |
Not even now can White move the Knight because of P - R 7 ch; K × P, R - R 3 ch; K - Kt 1, R - R 8 mate.
| 32. P - Kt 4 | R - R 3 | |
| 33. P - B 3 |
If 33 P - Kt 5, P - R 7 ch; 34 K - R 1, R × Kt; 35 R × R, R × P, winning easily.
| 33. ........ | R - Q 3 | |
| 34. Kt - K 7 | R (Q3) - Q 7 | |
| 35. Kt - B 5 ch | K - B 3 | |
| 36. Kt - R 4 | K - Kt 4 | |
| 37. Kt - B 5 | R - Kt 7 ch | |
| 38. K - B 1 | P - R 7 | |
| 39. P - B 4 ch | K × B P | |
| 40. Resigns. |
An ending worth very careful study.
Notes
[1] The value of the initiative is explained in section 20, p. 77.
[4] Full score and notes are given in My Chess Career, by J. R. Capablanca (Game No. 11).
[5] This position is elaborated under Example 50 (p. 80.).
[6] We give, from now on, games and notes, so that the student may familiarise himself with the many and varied considerations that constantly are borne in mind by the Chess Master. We must take it for granted that the student has already reached a stage where, while not being able fully to understand every move, yet he can derive benefit from any discussion with regard to them.
[7] A "hole" in chess parlance has come to mean a defect in Pawn formation which allows the opponent to establish his forces in wedge formation or otherwise without the possibility of dislodging him by Pawn moves. Thus, in the following diagram, Black has two holes at K B 3 and K R 3, where White forces, e.g. a Kt or B, could establish themselves, supported by pieces or Pawns.
[8] See game Capablanca-Kupchick, from Havana International Masters Tournament Book, 1913, by J. R. Capablanca; or a game in the Carlsbad Tournament of 1911, Vidmar playing Black against Alechin.
[9] See Niemzowitch's game in the All Russian Masters Tournament, 1914, at St. Petersburg, against Levitzki, I believe.
[10] See Capablanca-Janowski game, New York Masters Tournament, 1913.
