Gauge R And R
Gauge R&R: Comparison with Standards:
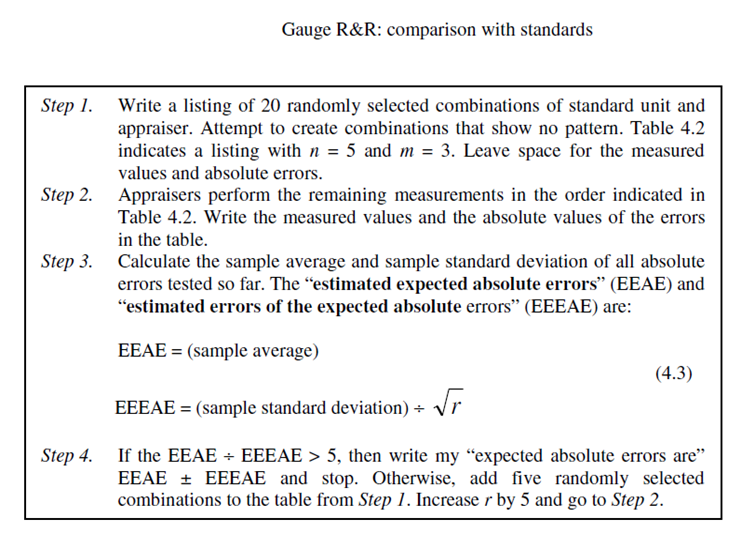
The “comparison with standards” method, is proposed formally here for the first time. However, similar approaches have been used for many years all over the world. The following defined constants are used in the method:
1. n is the number of units with pre-inspected standard values available.
2. m is the number of appraisers that can be assigned to perform tests.
3. r is the current total number of runs at any given time in the method.
The phrase “standard unit” refers to any of the n units with standard values available. The phrase “absolute error” means the absolute value of the measurement errors for a given test run. As usual, the “sample average” of Y1, Y2… Yr is (Y1 Y2 … Yr) ÷ r. The “sample standard deviation” (s) is m given by:

- Clearly, if destructive testing is used, each of the n standard units can only appear in one combination in Step 1. Also, it is perhaps ideal that the appraisers should not know which units they are measuring in Step 2.
- However, hiding information is usually unnecessary, either because the appraisers have no incentive to distort the values or the people involved are too ethical or professional to change readings based on past values or other knowledge. In the context of comparison with standards, the phrase “measurement system capability” is defined as 6.0 × EEAE.
- In some cases, it may be necessary to tell apart reliably system outputs that have true differences in standard value greater than a user-specified value.
- Here we use “D” to refer to this user-specified value. In this situation, the term “gauge capable” refers to the condition that the measurement system capability is less than D, i.e., 6.0 × EEAE < D.
- In general, acceptability can be determined subjectively through inspection of the EEAE, which has the simple interpretation of being the error magnitude the measurement system user can expect to encounter.
